Blog

Genre and p5

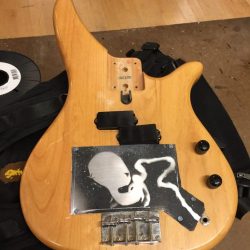
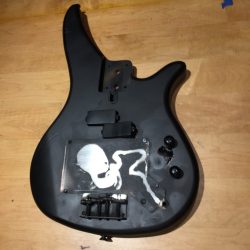
So for this assignment, I wanted to play around with the sound library in p5 by visualizing different genres on my bass. I was curious if there was any visible difference between funk and classical or rock and something more harmonic when the notes were given a form. I’m curious to see what happens if I play a p5 sketch before I play the video of me with the bass to see if people can guess what genre this is. Unfortunately, the audio that I got from my Mac speakers is… nothing short of awful. But it’s mostly there to prove that what I am playing is what is occurring in the sketch. The code is at the very bottom of the sketch. 

var song;
var fft;
var button;
var mic;

var volhistory = [];

function toggleSong() {
background(255);
}

function setup() {
createCanvas(400, 400);
mic = new p5.AudioIn();
mic.start();
angleMode(DEGREES);
button = createButton(‘toggle’);
button.mousePressed(toggleSong);
//song.play();
fft = new p5.FFT();
fft.setInput(mic);
}

function draw() {
// background(0);
var spectrum = fft.analyze();
var vol = mic.getLevel();
stroke(random(255), random(255), random(255));
for (var i=0; i var amp = spectrum[i];
var y = map(amp, 0, 256, height, 0);
ellipse(i, y, vol*200, vol*200);
}
// volhistory.push(vol);
stroke(255);
noFill();
}
// translate(width / 2, height / 2);
// beginShape();
// for (var i = 0; i < 360; i++) {
// var r = map(volhistory[i], 0, 1, 10, 100);
// var x = r * cos(i);
// var y = r * sin(i);
// vertex(x, y);
// }
// endShape();

// if (volhistory.length > 360) {
// volhistory.splice(0, 1);
// }
// //ellipse(100, 100, 200, vol * 200);
// }

Stopmotion

I have been thinking about this class since I signed up for it. My background before this program was in theater, especially original, ensemble based theater. While ITP has been a blast so far, it’s been difficult for me to focus solely on content and story in ICM, PComp or Fabrication so I was really looking forward to animation. I’ve had two characters stuck in my head for some time now and all I know about them is that…one is an old man, and one is an old dog. I know the old man is lonely, that his wife has passed and that he talks to her. I know the dog’s days are numbered. I also know Samuel Beckett is a very influential part of my life and so is the comedy of the tragic.

For this first project, I just wanted to bring these two characters to life. I plan to work with them a lot this semester and I wanted to start to get a sense of what they were like. I had the idea that this old man visits his wife’s grave everyday only to find the flower he’d placed there the day before eaten to the stem. I figured it’d be a nice exercise in futility if he came back every day, pondered who ate the flower, placed a new flower there only to walk off before realizing it was his own dog who’d eaten the flower. The man isn’t necessarily upset by all of this for the same reason that Camus posited Sisyphus was happy: at least he has a task. It’s definitely a study in Waiting for Godot meets Sisyphus.

Anyhow, I presented the idea to my group and they were – luckily for me – super gung ho about it. I have to say, from the top, this was the most pleasant group experience I’ve had at ITP and perhaps in my time as an artists. We communicated well, bounced ideas off one another, helped each other grow, and – most importantly – each filled a very specific role: I led most of the concept and storyboarding, Jixuan really took charge of the artistic direction and aesthetic and Roi took the lead on the filming and editing. With that said, all three of us contributed on everything, but still there was a point person. Even the building of the clay figures was a holy collaborative experience. All parts of the process – storyboarding, buying the materials at Blick, setting up the shots, filming, editing, sound editing – involved valuable input from all of us.

At the end of the day, I’m really proud of the work we created. It isn’t exactly what I had in mind but it took on a life of it’s own for sure and I’m really excited to continue exploring these two characters lives.

Serial Communication Blog Post/Bonus Servo Post

So for my lab I wanted to take the first step towards my mid-term by adding a sensor value to a baseball sketch that I had made**. Here is sketch pre serial-communication addition (the code for both sketches is featured at the bottom also turn your sound either off or really low: if you’re reading this at 4:00 am the last thing I want is for this loud crack of the bat to wake up Noodles):

As you can see, a ball is pitched from the mound and then the bat is swung using mouseY. When the bat makes contact with the ball, you record a hit and the crowd goes wild. For this assignment, I decided to replace mouseY with a potentiometer as I felt it would add a nice level of realism to the game.

Going further with this in the days to come, I’d like to replace the potentiometer with an accelerometer that is attached to an actual (mini) bat but I’m a bit concerned. I talked with Matt Romein about trying to make it so that when the bat is swung in real life, the bat is swung in the p5 sketch. He had mentioned that may be very difficult and would be best to make it so that when the accelerometer reaches a certain velocity, the bat is swung. I would then have to make sure there is an incredibly minimal delay between the velocity being reached and the bat being swung. Hopefully you’ll be reading about my solution to this project in the mid-term blog!
** Don’t want you to think I made Mona do a baseball project or that I have a one track mind. I totally just posed the idea to her as nothing more than that: an idea and she thought it would be a good way to showcase physical computing. I suppose I’m getting a bit insecure about that so I just wanted to mention it.
P.S Here is a link to my final Fab project which involved some physical computing.
Code for Sketch 1:

var x = 320;
var y = 235;
var speed = 3;
var speedb = 0;

function preload() {
img = loadImage('battersbox.jpg');
mySound = loadSound('Cheer.mp3');
image2 = loadImage('Bat.jpg');
image3 = loadImage('baseball.jpg');
}

function setup() {
createCanvas(600, 600);
img.loadPixels();
image2.loadPixels();
image3.loadPixels();

}

function draw() {
background(220);
image(img, 0, 0, 650, 500);
baseball();
pitch();
returnball();
bat();
swing();
}

function baseball() {
fill(255);
ellipse(x, y, 25, 25);
image(image3,x-15,y-10,25,25);
}

function pitch() {
y = y + speed;
x = x + speedb;
if (y >= height) {
y = 235;
}

}

function returnball() {
if (x > 600 || x < 0 || y > 600 || y < 0) {
baseball();
x = 320;
y = 235;
speed = 3;
speedb = 0;
}
}

function bat() {
translate(135, 400);
rotate(mouseY / 600.0);
fill(100, 100, 100);
rect(40, 30, 160, 20);
print(mouseY);
image(image2, 40, 30, 160, 20);
}

function swing() {
d = dist(x, y, x, 430);
if (d < 1 && mouseY/100 < 0.25) {
mySound.play();
speed = speed * random(-4, -1);
speedb = speedb + random(-10, 5);
}
}


Code for Potentiometer Sketch
In p5

var x = 320;
var y = 235;
var speed = 3;
var speedb = 0;
var serial;
var sensorValue = 0;

function preload() {
img = loadImage('battersbox.jpg');
mySound = loadSound('Cheer.mp3');
image2 = loadImage('Bat.jpg');
image3 = loadImage('baseball.jpg');
serial = new p5.SerialPort(); // make a new instance of serialport library
serial.on('list', printList); // callback function for serialport list event
serial.on('data', serialEvent);// callback for new data coming in
serial.list(); // list the serial ports
serial.open("/dev/cu.usbmodem1411"); // open a port
}

function setup() {
createCanvas(600, 500);
img.loadPixels();
image2.loadPixels();
image3.loadPixels();

}

function draw() {
background(220);
image(img, 0, 0, 650, 500);
baseball();
pitch();
returnball();
bat();
swing();
}

function baseball() {
fill(255);
ellipse(x, y, 25, 25);
image(image3,x-15,y-10,25,25);
}

function pitch() {
y = y + speed;
x = x + speedb;
if (y >= height) {
y = 235;
}

}

function returnball() {
if (x > 600 || x < 0 || y > 600 || y < 0) {
baseball();
x = 320;
y = 235;
speed = 3;
speedb = 0;
}
}

function bat() {
translate(135, 400);
rotate(sensorValue / 600.0);
fill(100, 100, 100);
rect(40, 30, 160, 20);
print(mouseY);
image(image2, 40, 30, 160, 20);
}

function swing() {
d = dist(x, y, x, 430);
if (d < 1 && sensorValue/100 < 0.25) {
mySound.play();
speed = speed * random(-4, -1);
speedb = speedb + random(-10, 5);
}
}

function printList(portList) {
for (var i = 0; i < portList.length; i++) {
// Display the list the console:
println(i + " " + portList[i]);
}
}

function serialEvent() {
var inString = serial.readLine();
if (inString.length > 0) {
inString = inString.trim();
sensorValue = Number(inString/4);
}
}

for Arduino:

void setup() {
Serial.begin(9600);
}

void loop() {
int sensorValue = analogRead(A0);
Serial.println(sensorValue);
delay(1);


Tet-Trees

Man, what a journey this assignment was! Originally, I was going to do a small enclosure for a book but I realized I wanted more of a challenge; I wanted to make a Gameboy. My inspiration came when Ben was showing us hollowed out blocks of wood with pencil markings that – to me – resembled the controls of a Gameboy. Knowing that I would need a piece of wood that had a lot of depth so it could be hollowed out, I went out looking. Lowes had nothing thicker than an inch, and Home Depot wasn’t helpful either. Enter Michaels. They had a SECTION of tree stumps including the one I purchased. At the time, I wasn’t quite sure what I was going to do with the slab of wood, I was just happy that it was thick and that it had some character to it (I also made sure it could be used for etching should I decide to go that route).

Friday morning I brought my old Gameboy Color to school and took it apart. As I sat there with it’s components in my hand, I realized it would be sort of lame and unoriginal to just take those components and place them in a new enclosure. It lacked creativity and didn’t excite me as much. I thought it would be cooler to incorporate some P-Comp into the work by making a game on my Arduino and placing that in an enclosure. Before I could begin any of that enclosure work however, I would need to know the size and height of the game. Would there be a lot of wires? Would it be compact and malleable or huge and begrudging? I found a link on Instructables to a Tetris game made on the Arduino.

After two trips to Tinkersphere (best to make sure you have the correct parts on the first trip rather than walk back in the rain to exchange the wrong components), I set to wiring and programming the microcontroller. After everything was wired up, I provided power to the microcontroller only to realize something was wrong. About six hours later, and with some help from resident Joe Mango, I realized that the 8×8 LED matrix I purchased was a slightly different model than the one featured despite them looking the identical. It turns out that the anodes and cathodes in an 1088 8×8 LED matrix differ from those in the 1588 8×8 LED Matrix and as a result the code provided on instructables would not work unless adjusted. Once the code was properly corrected I had my working Tetris and all I needed was a proper enclosure.

Originally, I wanted to cut out a Gameboy-like box to put Tetris in but a few factors led to me changing my mind: I knew I would not be able to laser cut the tree slab, I knew it would be difficult to cut it with any precision due to its circularity, I wanted to maintain the aesthetic the tree provided. I decided maybe it would be less complex and more efficient to maintain the slabs form and just hollow it out as opposed to trying to make it hand held.

I measured Tetris – the arduino, the LED matrix, the joystick and the height of the wires – and figured out how deep I needed to drill into the wood.

I used a 1.5 inch bit and did a bunch of passes with that, then used a 0.5 inch bit to clean it up and make it flat.

Now, the biggest difficulty I faced was how deep could I drill into the wood without boring through to the bottom. I was left with a choice: bore straight through and put a slab of acrylic on the bottom that could be screwed in an out and loaded into the wood like a little elevator, or keep the floor all wood and load everything through the top. I decided to go with the later. As a result, I needed to know how deep I could go before hitting the bottom. I measured the height of the wood, subtracted about 1/3th of an inch and drew a line in dry erase marker on the bit. Though I couldn’t see that line when the bit was spinning, when I stopped drilling I could see approximately how much deeper I needed to go. The issue was I didn’t trust myself. I drilled 9 holes about an inch away from the marked line and then had to do it all over again when I wasn’t satisfied. Had I trusted my measurements, that process could’ve taken an hour as opposed to the two it took.

I am text block. Click edit button to change this text. Lorem ipsum dolor sit amet, consectetur adipiscing elit. Ut elit tellus, luctus nec ullamcorper mattis, pulvinar dapibus leo.

With my bedding all set, I set out to create a top to screw on to enclose the microcontroller. My original idea was to laser cut a piece of quarter inch ply into the piece to be screwed on and on that piece would be cut out a box to stick the LED and a box to put the joystick. After making the file in illustrator, I enlisted the help of Jesse to give me a refresher course on laser cutting. The first go wasn’t great, it was catching flame – very briefly mind you – a bit too frequently. After the fourth or fifth go there was no change, the wood just looked a LOT darker and it wasn’t going through. At this time, I had to go help out a group with a sound and video project. When I returned, I cut out another piece of ply (from the same ply that was used before which is important for later) and was comparing it to the burnt piece.

John saw me looking at the burnt piece and asked me what happened. I told him and he figured it was because the auto-focus wasn’t turned on the laser cuter. We set up everything again with this new piece of ply and while it wasn’t catching fire as much, after five passes it wasn’t cutting through. John told me it probably wasn’t going to cut if it hadn’t done so after all these passes and asked if he could cut the wood open to see what was happening. I obliged.

While he was operating on the ply, I pivoted to using the acrylic that I had left. I thought it would be cool aesthetically to mix something a little more technical and glossy looking with something natural like wood. Before I laser cut the same design, I remembered the mistake I made with my keychain last time: I needed to laser cut holes to drill into because drilling into acrylic can be a bit risky. I adjusted the file accordingly and my first cut came out looking really good. John returned and showed me that the wood had stopped cutting about 2/3rds of the way through and that it was just an issue with the wood: “ply is a tricky variable.”

Now that I had the top of the design, I needed to make sure that it would be able to be drilled on properly with all the electrical components fitting inside. I set up Tetris and tried to shove all the wires in but to no avail, the bed would have to be lowered by at least another half inch if not another full inch. I returned to the drill press and drilled deeper. Turns out I used the same bit I drilled with on Saturday and had forgotten to remove my dry erase line. What do you know, when the bed was at the proper height, it matched the original marking I made on Saturday. Had I just trusted my measurement, I wouldn’t have had to use the drill press for a third time.

With the bed correct, I was able to place the microcontroller into the wood snuggly. I drilled a hole in the top so that I could provide power to the board, wired everything together and it all seemed to work… minus one thing: the joystick had nothing to lock it into place.

Due to the bizarre measurements of the joystick – it juts out at weird places and needs to almost be fully exposed to have a full range of motion – I couldn’t just lock it into the laser cut like the 8×8 LED did. At first I thought maybe I could cut out some acrylic, bend it with the acrylic bender, glue it to the inside of the enclosure and provide a little bed for the joystick to rest upon. After tinkering with measurements and cardboard for a while, I came up with a mini-prototype. Then I realized, on the left side of the joystick there are 5 electronic pins to run wires to, if I was going to do this with acrylic I would have to properly measure the minute little bends, and laser like 1/16th holes in the acrylic to run the wires through and even then it may not work because of the lack of malleability of the wire heads. (As I write this however I realize that rather than resting the joystick in the bed, I could’ve done the same thing but turned the acrylic upside down and had it sit upon it…though I think what I figured out is a similar solution).Rather then do that, I thought maybe I could rest the joystick on a small piece of wood inside the enclosure and use that to lock it in place. I found a piece of scrap, cut it to be about an inch by an inch with the band saw and rested it in the enclosure and it worked perfectly.

I still wasn’t satisfied though. The acrylic was looking a bit bland and needed something a bit clever to pull it all together. I had tetris, I had a tree, I had Tet-Trees. I etched that into the acrylic and there it was, a final project that I am really, really proud of. Would I change a few things? Absolutely. I’d use a different acrylic so the etching would pop a lot more and I’d figure out a better way to lock that joystick in place but still, I think it’s a really cool piece and I’m excited to show it off.


Synthesis Day and Sketch


Synth Day

To be honest, this wasn’t too much of a struggle for me. Or the only moments in which there was a struggle was the debugging… I guess that’s always the case though. I didn’t have trouble conceptually. It was pretty rudimentary to understand that you’re replacing a variable with a sensor value and that sensor is going to have an effect on your sketch. What was difficult, and what I would like to understand a bit more of, is what exactly is happening in all of that code that we virtually copy and paste on synthesis day. That aside, the day was enjoyable for the sheer amount of possibilities it opened up including for the baseball sketch I can’t seem to get away from.

In terms of that sketch, my partner Swapna and I thought it would be cool to “become” the pitcher in my baseball sketch. Rather than have the ball automatically redraw itself once it left the frame, it would be cool to determine via the press of a button when the baseball would be thrown. Adding that definitely makes the sketch more of a game just a really…boring one. However it’s a start. Perhaps now I can introduce four different buttons each corresponding to a different pitch; button one is a fastball, button two a curve etc. My P-Comp – and hopefully ICM – midterm is going to revolve around a lot of this stuff. DO YOU KNOW ANYONE AT MLB, DANO?!

SKETCH


I admit: I am having some problems again with ICM. It’s sort of like , you said in class, the plateau is gone and the hill is in the midst of being climbed. Once again, I understand the concepts. I know what a constructor function is and how they work logically. However, I am having a lot of difficulty applying the concept to a sketch from scratch. For my sketch this week, I took some code that was in the Coding Rainbow video and made it my own a bit which is fine. I understand that’s a viable way to learn. But what I’d love to do, and what I am still trying to work on is making this from the get-go. If I don’t understand a bit better by end of week, I see some office hours in our future. NO SPORTS TALK ALLOWED.


CODE:

var bubbles = [];

function preload () {
img = loadImage(“Coaster.jpg”);
}

function setup() {
createCanvas(600, 400);
img.loadPixels();
for (var i = 0; i < 20; i++) {
bubbles[i] = new Bubble();
}
}

function mouseDragged () {
bubbles.push(new Bubble(mouseX, mouseY));
}

function draw() {
background(255);
image(img,0,0,600,400);
for (var i = 0; i < bubbles.length; i++) {
bubbles[i].move();
bubbles[i].display();
}

if (bubbles.length > 10) {
bubbles.splice(0,1);
}
}
function Bubble(x,y) {
this.x = x;
this.y = y;

this.display = function() {
stroke(255);
fill(0);
rect(this.x,this.y-24, 25,25);
stroke(10);
strokeWeight(2);
fill(255);
ellipse(this.x+24,this.y,12,12);
ellipse(this.x, this.y, 12, 12);

};

this.move = function() {
this.x = this.x + random(-0.5, 0.5);
this.y = this.y + random(-0.5, 0.5);

};
}


Mystery and Collaboration

The content in the readings this week really resonated with some core beliefs of mine. From 2008 – 2015, I taught at a program in New York City called the School of Creative and Performing Arts (SOCAPA). One of the many courses that I taught, and my pride and joy, was a course called “Create Your Own Work”. I took a group of about fifteen 14- 18 year-olds and taught them how to create original work. My students struggled with a lot in this class, which was ironic because they could’ve created virtually anything for any assignment and it would’ve been ok. For some reason though, they weren’t able to get out of their own way: they were unsure of where to start, unsure of where to expand upon their ideas and unsure of how to convey what they wanted to convey. They blamed this on their “lack of creativity”. They thought, “Man, I can’t even think of one original thing, I’m so dumb.” I tried to show them that the opposite was true. Teenagers are one hell of an opinionated bunch and once they were given the permission to express those opinions, the floodgates opened. Once they realized that they didn’t need permission to express those opinions? Then – in my opinion – they left changed. Despite the fact that there was so much amazing growth in those classes, there was one thing the students were unable to get over. They couldn’t stop explaining their work.

One student, Peyton, created a piece where she took six or so floor mats and stood them up vertically, arranging them so that they made a maze. In the center of the floor mat maze was a small candle, a tiny desk, and a few pieces of paper with notes scribbled on them. The other students were really excited and intrigued by this piece and when it came time to ask questions, the first one was, “What did it mean?”. Peyton then proceeded to do what virtually every student in my years of teaching did in their first project: she explained every single thing about her piece. After she was done, I put the class on pause. “Why did you do that?” I asked. “Well, she asked me a question and I wanted to let her know what everything meant.” I asked the class if Picasso was present when his work was showed, if Lynch was at everything screening of his films, if Kinski explained his choices in Aguirre, Wrath of God. I told them what I told every other student who took that class. Your audience will form their own opinion and theirs is just as, if not MORE, vital to the piece than the definition you could give them. By providing them with a definition, the piece is concrete and sinks out of memory. But if there is allure and mystery, I may find myself thinking about it tonight, and tomorrow and perhaps next month. So for an artist to provide an answer to the question “What does it mean” is to remove it from consciousness, to make it more concrete.

The other core belief that the “Sketching User Experiences” reading touched on was collaboration. From 2010 – 2014 I worked with a theatre company that I founded to make work that focused on collaborating with other artists. Rather then take a pre-written play, we would all work together to build an entire show from scratch. Collaboration has really been an integral part of my life since…well, I guess since I joined a band when I was in middle school. It’s just sort of how I create. So a few of these readings have been sort of surreal to me because they make collaboration seem like a sort of new idea. The way Buxton – and Norman in readings past – talks about integrating designers into work seemed so…apparent to me. I was sort of shocked to read that it was something that needed to be brought up instead of something that just naturally happened.

I think this is why this program has been so refreshing: it champions the benefits of collaboration and the notion that work doesn’t need to be explained. In a weird way, it almost makes me anti-instruction manual. Why not just give a public a product and see what they make of it. I guarantee the masses will end up utilizing ‘it’ in a way in which the inventors and designers never imagined possible.


Sigur Ros Bass

We’ve talked about in class how the purpose of some of these assignments is to be able to construct something in a short period of time. I sort of took that to the extreme this week. Usually, I buy my materials on Friday, start working on Saturday and try to be finished on Monday however my dad came into town on Friday and I wasn’t able to get any work done on the weekend giving myself a really short amount of time. I interpreted that as a new challenge.

 Rather than find two completely new separate materials, I decided to take advantage of an old broken bass I had laying around. I looked up the model and confirmed that it was indeed made out of Maple, making it eligible to be used.

I am text block. Click edit button to change this text. Lorem ipsum dolor sit amet, consectetur adipiscing elit. Ut elit tellus, luctus nec ullamcorper mattis, pulvinar dapibus leo.

Originally, I wanted to take some delrin, etch a design into it and fasten it to the empty space in the bass between the pickups and the bridge. 

However, it would take a day or two for the delrin to get to me and I wanted to start immediately. Than I thought maybe I could use leather and it didn’t seem to appealing to me so I pivoted to aluminum. I found a shop in the city that sold it – Metalliferous – gave them a call to confirm they had sheets and head up town.

When I got there I found two sheets of aluminum and asked them if it was anodized to which they said they didn’t know but they were pretty sure it was. I asked if it could be laser etched then – knowing it needed to be anodized to be etched therefore if they knew it could etched with a laser it would be anodized – to which they said, “absolutely”.

Cut to an hour later, I decide to double check with John who shows me that it is indeed NOT anodized. I had two options: change my approach or go up and return the aluminum. I decided to go with the former. I figured I could just cut out my piece and than spray paint a stencil onto it.

I measured the area I wanted the aluminum to cover and used those measurements to make a cardboard prototype. Once I was happy with that I used those same measurements and looked for some nibblers to cut my aluminum. Jordan saw what I was about to do and introduced me to the power nibbler, which made that process a hell of a lot easier. After cutting out my aluminum, I focused on creating the design to put on top of it. A few nights prior, I had seen one of my favorite bands, Sigur Ros, live and was feeling really inspired by them. One of their album covers is a fetus and I thought it would be cool to put that in what looks like the womb of the bass. I took the album cover and put it into photoshop and, with much help, vectorized it and prepared it to be cut. I used some excess cardboard as material and cut out a little fetus I was happy with. 

Knowing I didn’t have a lot of excess materials, I wanted to make sure I was going to get things right. I decided to take my fetus etch and spray paint it over some excess aluminum. I prepped the aluminum by washing it off and scraping it with a scouring pad, applied duct tape to the bottom of the fetus and placed it on the aluminum. My first spray was really successful so I moved on to doing the same procedure on the sized cut of aluminum. This one wasn’t so successful. I applied too many coats and it bled through the bottom of the cardboard and it looked awful. Luckily, the prototype spray looked good, so I just cut that out to the right proportions and screwed it on the bass. 

I was unhappy with how the aluminum looked with the maple wood backing though so I decided to take the spray I had remaining and cover the entire bass black so the fetus would pop more. I think it ended up looking really cool. For the future, I’d love to make it so that when the bass is plugged in, the fetus lights up –hence why the umbilical chord goes to the plug-in jack – but that’s a project for a different day.

Boom-Bach, Nightlights and Stress

Tom: I enlarged and bolded the font to – hopefully – make this an easier read on your eyes. If this is still an unpleasant experience let me know and I’ll continue adjusting. Thanks!

Now that I’m a little bit more comfortable with the Arduino, I thought it would be fun to try to use my sensors for fun applications. The first one I came up with was a photocell that I used to turn into a nightlight. I wired my photocell to my analog input, put a 10 kilo-ohm resistor at the junction point, and connected an LED to a digital input. When first trying to figure out the code, I was using if statements but then I realized I just had to go back to what we’d learned earlier with digitalWrite and the process became a lot simpler. Here is a video of the nightlight at work and the code that made it work.

The second application was birthed of the love-o-meter in the lab. I don’t know about you but watching that debate last week got my blood boiling. I figured I’d take the love-o-meter and make it a stress-o-meter for the next debate: if I wasn’t really squeezing the FSR then I could keep watching the debate (as would be indicated by the green light). However, if I was starting to get too pissed off at Trump and was squeezing the FSR too hard, it would probably be better for me to change the channel.

Last but not least, I wanted to play around with melody and the Arduino. One of my favorite songs to play on my bass is the Bach’s Cello Suite # 1: Prelude in G Minor. I really wanted to hear how it would sound coming from a microcontroller so I pulled up the sheet music and input the first eight bars into the code. To me hearing it come from an Arduino as opposed to a cello is akin to that infamous transition in 2001: A Space Odyssey when the ape throws his bone-cum-instrument into the air only to have it “land” as a futuristic space vessel. There is one thing I am still struggling to figure out though: how to control the volume on the 8ohm speaker. I think the people around me on the floor don’t like Bach as much as I do.

#include “pitches.h”

int melody[] = {
NOTE_G3, NOTE_D4, NOTE_B4, NOTE_A4, NOTE_B4, NOTE_D4, NOTE_B4, NOTE_D4,
NOTE_G3, NOTE_E4, NOTE_C5, NOTE_B4, NOTE_C5, NOTE_E4, NOTE_C5, NOTE_E4,
NOTE_G3, NOTE_FS4, NOTE_C5, NOTE_B4, NOTE_C5, NOTE_FS4, NOTE_C5, NOTE_FS4,
NOTE_G3, NOTE_G4, NOTE_B4, NOTE_A4, NOTE_B4, NOTE_G4, NOTE_B4, NOTE_G4,
NOTE_G3, NOTE_G4, NOTE_B4, NOTE_A4, NOTE_B4, NOTE_G4, NOTE_B4, NOTE_FS4,
NOTE_G3, NOTE_E4, NOTE_B4, NOTE_A4, NOTE_B4, NOTE_G4, NOTE_FS4, NOTE_G4,
NOTE_E4, NOTE_G4, NOTE_FS4, NOTE_G4, NOTE_B3, NOTE_D4, NOTE_CS4, NOTE_B3,
NOTE_CS4, NOTE_G4, NOTE_A4, NOTE_G4, NOTE_A4, NOTE_G4, NOTE_A4, NOTE_G4,
NOTE_CS4, NOTE_G4, NOTE_A4, NOTE_G4, NOTE_A4, NOTE_G4, NOTE_A4, NOTE_G4
};
int noteDurations[] = {
16, 16, 16, 16, 16, 16, 16, 16,
16, 16, 16, 16, 16, 16, 16, 16,
16, 16, 16, 16, 16, 16, 16, 16,
16, 16, 16, 16, 16, 16, 16, 16,
16, 16, 16, 16, 16, 16, 16, 16,
16, 16, 16, 16, 16, 16, 16, 16,
16, 16, 16, 16, 16, 16, 16, 16,
16, 16, 16, 16, 16, 16, 16, 16,
16, 16, 16, 16, 16, 16, 16, 16,
16, 16, 16, 16, 16, 16, 16, 16,
16, 16, 16, 16, 16, 16, 16, 16,
16, 16, 16, 16, 16, 16, 16, 16,
};

void setup() {
for (int thisNote = 0; thisNote < 96; thisNote++) {
int noteDuration = 1000 / noteDurations [thisNote];
tone(8, melody[thisNote], noteDuration);

delay(noteDuration + 96);
}
}
void loop() {
}

My First Baseball Game

Well it’s certainly getting to that point where ICM is a challenge. I think the difficulty I’m having with it is that I am just overwhelmingly anxious about it yet when I try to pinpoint what specifically I am anxious about, I can’t. I was explaining it to my friend Patrick this way: when I eat lunch I eat my sandwich, then my chips, then my dessert. I don’t understand those people who eat chips while they’re eating those sandwich and I have a severe disdain for those monsters who put chips ON their sandwich and that’s what coding is. I understand for loops and if statements and Boolean variables independent from one another but when you put all of them in a sandwich? Uh-uh.

I decided the best way to deal with my anxiety about all of this was to start simple…keep it rudimentary, ya know. So that explains my first sketch. I originally wanted it to be people watching TV and when you clicked on the television, it turned on to show Dan-O’s face. I was getting way too stressed and not getting to my other assignments so I decided to simplify it. Instead of focusing on mousePressed or anything like that, I just kept it simple with if statements. I felt pretty confident about inserting images so I decided to put Dan-O’s face in there to try and somewhat keep with my theme.

My second sketch was one I was really proud of and one that…sort of let things click in my mind. I was taking a break from ICM and watching the end of the Orioles game. It was the top of the 9th, man on first against a division rival who we needed to beat to stay alive in the playoff race. My favorite Oriole, Hyun Soo Kim, came up to bat with a man on first down by a run, and then BAM a two run shot to right center field. I decided I had to commemorate this moment in code. I started with an image behind home plate. I inserted some variables – something I felt shaky doing – and figured out logically how to make what I wanted to make. I threw in some if statements and as I was doing so was like….man, I can make a game of my own. So I inserted a mousePressed function that made the ball appear to be hit when the mouse was clicked. To make it more difficult, I decreased the range in which you could “swing” (read: click). I also figured I needed to add sound so I used the reference library but couldn’t get it quite right. Thanks to Matt and Kat, I was able to realize my issue: I was doing function preload twice.

For the last sketch…it was sort of a failure but I figured it was a good learning experience. I used a for loop to set up my images but I want them to be able to switch places (pink on bottom, blue on top…how risqué), when mousePressed is clicked but I can’t figure out how to do it for the life of me.

A Future of Desired Disability?

I feel as if our current cultural climate is one of awareness. Those who were deemed ‘other’ are speaking out and asking for the rights that they feel as if they’ve been denied –and are obviously entitled to – and the public is finally starting to listen. While there are truly a bevy of communities looking for equal rights and representation, lets look specifically at those who are handicapped. Early on in 2016, there was a successful movement to change the handicapped sign from one that focuses more on ability than disability. The past sign seemed to convey inactivity and therefore invisibility. This coincides with what Pullman discusses, that, “the priority for design for disability has traditionally been to enable while attracting as little attention as possible.” The intention in disability design seems to have been to make something as unobtrusive and discretionary as possible so that those with disabilities don’t feel as if they’re singled out and stigmatized. The intentions there are obviously good but that in and of itself rings of the age-old aphorism: the road to hell is paved with good intention. The danger that Pullman posits about a signal being sent out that to be disabled is something to be ashamed of is spot on and therefore it’s time to change it.

In the beginning of the reading, the author talks about how Ray Eames started to make sculptures out of spare leg splints that were not being used for the betterment of soldiers. This along with several other factors – notably the work of Charles Eames – contributed to the birth and success of plywood furniture in the 1940’s and 50’s. While the visual languages made by Eames wasn’t the driving force behind the plywood boom, it was certainly a factor. This got me thinking about art and how it can introduce concepts into the world. Eames turning of disability tech into an art form opened awareness to a disability and it got me thinking about how disability is portrayed in today’s media.

Aimee Mullins is an award-winning athlete who happens to have prosthetic legs. She’s one of many poster children for disability tech not being discrete yet the artificiality of Mullin’s prosthetics is controversial still. The author posits that this could be gender related and I certainly won’t deny that that could play a big part of it but what I want to take a look at is how and where we’ve seen these before in media.

The following clip is from the movie The Kingsman. It was a hit in the box office and is still talked about in a cult-classic sort of way. This particular clips shows a fight between the protagonist and Gazelle, a women who has the some prosthetics that Aimee Mullins has.

Obviously this film isn’t lauded for it’s subtly. It features people doing incredible feats of strength and is meant to cause wonderment. Gazelle possesses just as much superhuman ability as our protagonist yet she runs into the same issue that Aimee does with her insurance company in customizable prosthetics. On the one hand Gazelle is being viewed as able-bodied. Her disability doesn’t seem to be too much of a disability in this scene. On the other hand, her disability is featured but she sort of seems to rise above it in a way. I mean think about her name itself: “Gazelle”. It seems to suggest that she’s almost superhuman. Gazelle isn’t looked down upon, especially if you’re a fan boy, in fact she’s fawned over. She’s sleek, she’s sexy and she can kick your ass.

So an interesting dilemma is brought up here: should disability design make those with disabilities more “able-bodied seeming” and “normal” or should it elevate the disabled community above that, to a place where they unique. Are we moving to a realm in which because of the advances of technology it’s…cool to have disability tech? The same thing happened with eyewear. It became sleek and fashionable. No one saw Forrest Gump and thought I wish I had those braces but people who have seen Minority Report or any other science fiction film for that matter can’t help but think, “Wouldn’t it be cool if I could see through walls with my eyes”?

That’s sort of what I’m curious about after this reading. What is the next step for disability design and what is the relationship between disability design and the lighting fast growth of technology. Will I want to replace by failing limbs in my old age with prosthetics. Will “disability” be chic or redefined?